“Train in the right zones” is advice you’ll hear constantly in cycling. But what does it actually mean? What are the zones, what does each one do, and why does it matter whether you’re at 240W or 260W?
This post breaks down all seven power zones, explains the physiology behind each, and covers how PeakPulse uses them in real-time coaching.
Where the Zones Come From
The seven-zone model was popularised by Dr. Andrew Coggan, one of the pioneers of power-based training. All zones are defined as percentages of FTP — your Functional Threshold Power — which means they’re automatically calibrated to your individual fitness level.
Before using power zones, you need your FTP. PeakPulse has a built-in FTP test and calculates all seven zones automatically once you’ve completed it. Every time you re-test and your FTP changes, the zones update instantly.
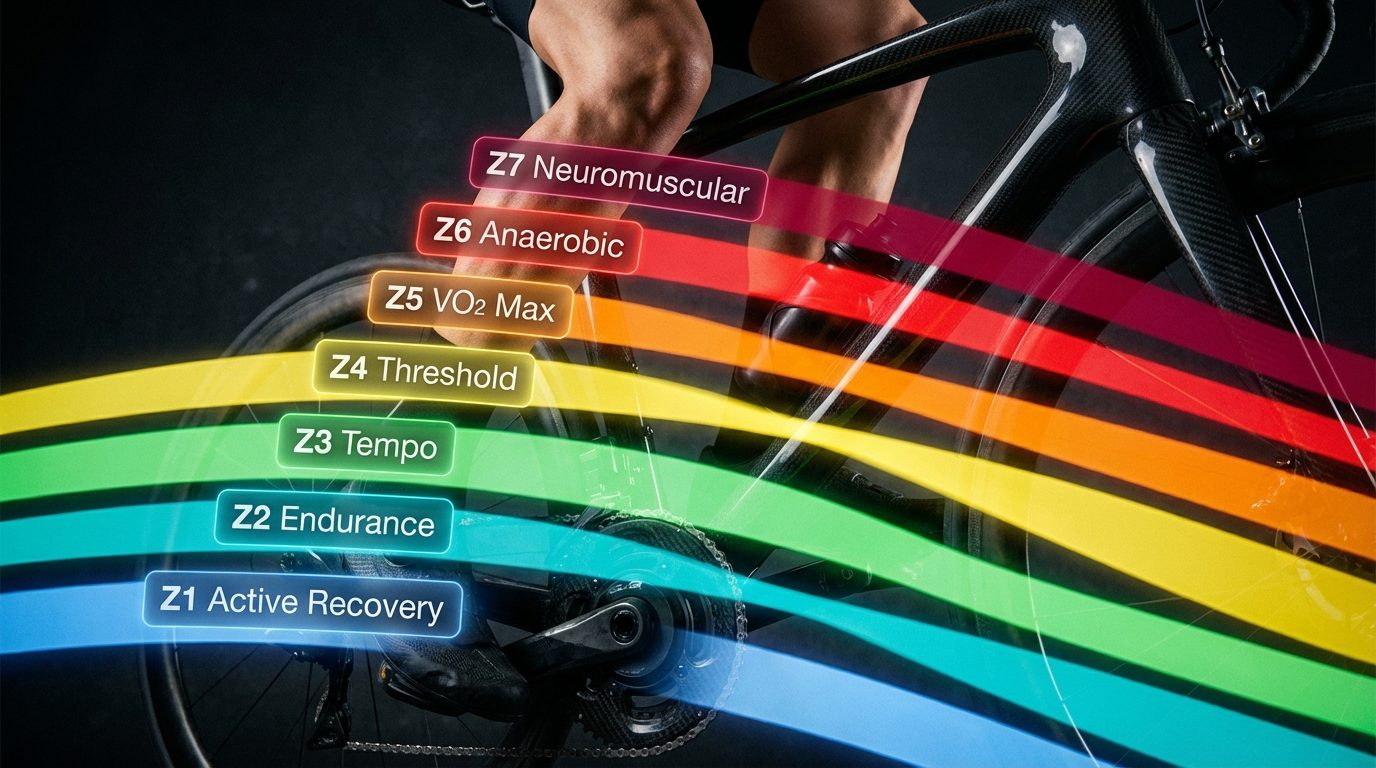
The Seven Zones
Zone 1 — Active Recovery
FTP %: Less than 55%
The easiest riding you can do while still moving. Zone 1 is for recovery days, warm-ups, and cool-downs. At this intensity, you’re promoting blood flow and clearing lactate without adding any meaningful training stress. If you try to “get some work in” during a recovery ride by pushing into Zone 2, you’re slowing your recovery. Zone 1 means easy.
When to use it: Day after a hard session, warm-up, cool-down, legs feel wrecked.
Zone 2 — Endurance
FTP %: 56–75%
The foundation of aerobic fitness. Zone 2 is conversational-pace riding that builds your aerobic base — improving fat oxidation, mitochondrial density, and the ability to sustain effort over long durations. It’s also where the bulk of professional cyclists’ volume sits.
Most amateur cyclists ride Zone 2 too hard. If you feel like you could talk in sentences, you’re probably in Zone 2. If you can only speak in words, you’ve drifted into Zone 3.
When to use it: Long rides, base-building phases, recovery weeks with light volume.
Zone 3 — Tempo
FTP %: 76–90%
Comfortably hard. Zone 3 is sustainable effort that produces meaningful training stress without the recovery cost of threshold work. The problem with Zone 3 is that it’s easy to spend too much time here — it feels productive but doesn’t give you the aerobic benefits of Zone 2 or the threshold adaptation of Zone 4. Many athletes end up “stuck in the middle.”
When to use it: Moderate rides where you want more than a recovery spin but less than a full interval session. Use intentionally, not by default.
Zone 4 — Threshold (Lactate Threshold)
FTP %: 91–105%
This is your FTP zone. Sustained work here improves your lactate threshold — the point at which lactate accumulates faster than you can clear it. Training at threshold raises the ceiling of what you can sustain. It’s hard, uncomfortable, and productive.
Classic threshold intervals are 2×20 minutes or 3×12 minutes. Your AI coach will keep you honest about staying in this range rather than drifting up into VO2 or down into tempo.
When to use it: The core of most structured training blocks for competitive cyclists.
Zone 5 — VO2 Max
FTP %: 106–120%
Short, sharp, and very hard. Zone 5 efforts train your maximal oxygen uptake — the absolute ceiling of your aerobic engine. Intervals in this zone are typically 3–8 minutes, with equal or longer recovery periods. They hurt a lot, but they produce significant fitness gains when used correctly (not too frequently, with adequate recovery).
When to use it: Build phase, race preparation, when you want to increase your top-end capacity.
Zone 6 — Anaerobic Capacity
FTP %: 121–150%
Very short, very hard. Zone 6 targets your anaerobic energy system — the sprint system that fuels efforts of 30 seconds to 2 minutes. Training here improves your ability to produce high power for short periods and recover quickly enough to repeat it.
When to use it: Criterium racing preparation, attacking on climbs, sprinting practice.
Zone 7 — Neuromuscular Power
FTP %: 150%+
All-out. Zone 7 is about pure neuromuscular power — training your muscles and nervous system to produce maximum force quickly. Efforts are typically 5–15 seconds. Recovery between efforts needs to be long — 3–5 minutes — to allow full ATP replenishment.
When to use it: Sprint training, explosive power development, final kilometre race simulation.
How PeakPulse Uses Your Zones
Once your FTP is set, your AI coach references these zones in real time during every session. Depending on your coaching style:
- Motivational: “You’ve slipped into Zone 3 — lift it back up, you’ve got this.”
- Technical: “Power at 82% FTP, returning to threshold. Target: 92–100%.”
- Minimal: Only alerts if you drift significantly off target for an extended period.
The zones also feed into your Training Load calculation. PeakPulse tracks how much time you spend in each zone across sessions and uses this to calculate your Chronic Training Load (CTL), Acute Training Load (ATL), and Form (TSB) — so you can see the cumulative effect of your training, not just individual sessions.
PeakPulse sets your seven power zones automatically from your FTP test and your AI coach uses them during every ride. Join the early access list to start training with purpose.